(Blog originally published April 2020)
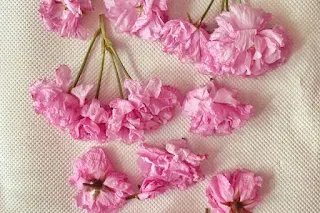
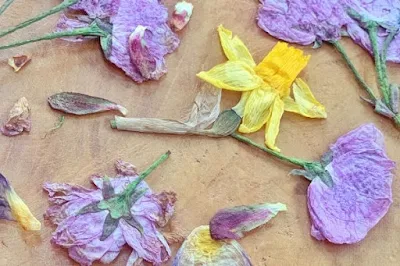
The best thing is that the lead up to making these links into some special experiences - you can forage in your garden for leaves, flowers and petals...or whilst out on your walk. We included some tête-à-tête daffodils that the children picked for me whilst I was poorly in quarantine to cheer me up and make me feel better, some tulips we had before lockdown and some cherry blossom flowers collected from a daily walk (also my favourite tree!). This activity is perfect for learning and teaching symmetry, discussing differences and changes, noticing patterns and details, following instructions and role play....


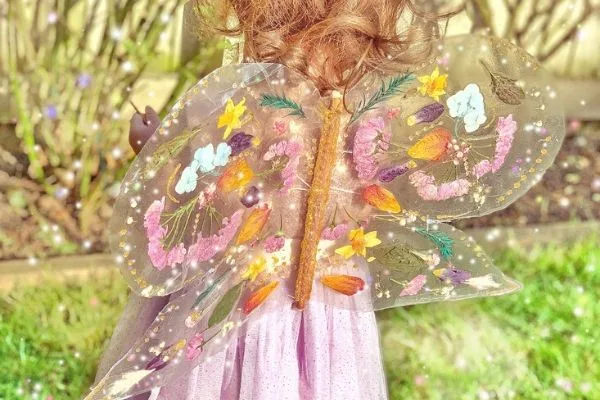
As you can see, these fairy wings are absolutely gorgeous, and it is a lovely activity for you to do alongside your child, leaving you with a keepsake that you can keep, use and remember. This is a great one for learning all about symmetry in a fun and purposeful way - but don't worry too much if your child doesn't want to make their wings symmetrical... the process of making these butterfly wings still includes a lot of important learning opportunities even if your child is not yet ready for symmetry.
Disclosure: As an Amazon Associate I earn from qualifying purchases
How to make Fairy Butterfly Wings with Pressed Flowers
First of all, you will need to collect some foliage and flowers to add to your wings. This will make your wings much more special as they will tie into some lovely memories if you can make this purposeful. If this isn't possible, they you can of course order some pressed flowers here.
Would you like to skip straight to the video of how to make the wings?
link here: https://youtu.be/aSy5Y72brFE What products and resources do you need to make fairy butterfly wings?
Aside from the pressed flowers mentioned above, you will also need:
- Contact or tacky back paper
- Glue gun
- Clear glue sticks
- Glitter glue sticks (optional)
- Scissors
- Blu-tack
- fine permanent marker pen
- elastic string
- a stick (we used one we found)
- Kitchen roll
- ribbon (optional)
How to press and dry flowers quickly in the microwave:
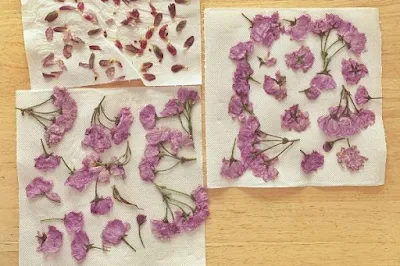
Cut the flowers from the twigs, or remove the petals and lay them on a piece of kitchen roll. Cover with another layer of kitchen roll and place a microwaveable dish on top to flatten them down....
Place in the microwave (under the dish) for 30 seconds. Remove and check that the petals are not sticking too much to the kitchen paper. Replace the paper if needed. Repeat for another 30 seconds...
If the flowers are now flat but still very wet, you can remove the top layer and give them a few more seconds to help dry them out. Don't over cook them though!
Leave them out in the air for a little while to cool down and dry out fully...
Now your pressed flowers and petals are ready to be used to make your fairy wings!
How to make the fairy butterfly wings using contact paper and pressed flowers:
If you would like to see how to use your pressed flowers to make your fairy butterfly wings, have a watch of my video demonstration here: https://youtu.be/aSy5Y72brFE
(The video is only 4 minutes long, but demonstrates how to make the fairy wings with contact paper quickly and easily - please like the video and subscribe to my channel)
Fairy butterfly wings in action:
Here are some images of Charlotte wearing her fairy wings - we later added an extra ribbon to tie around her waist top help keep the wings in place as she flew around!


As you can see, these fairy wings are absolutely gorgeous, and it is a lovely activity for you to do alongside your child, leaving you with a keepsake that you can keep, use and remember. This is a great one for learning all about symmetry in a fun and purposeful way - but don't worry too much if your child doesn't want to make their wings symmetrical... the process of making these butterfly wings still includes a lot of important learning opportunities even if your child is not yet ready for symmetry.
Here are some of the learning opportunities included within this activity:
- Symmetry
- noticing differences and changes
- learning about the natural world
- naming and identifying plants and flowers - understanding the world
- discussing transparent and opaque
- following instructions - listening and attention
- fine motor skills handling the plants and flowers
- making relationship by working together
- mathematical concepts with shape, space and measures
- exploring and using media and materials creatively and for a purpose
- introducing new vocabulary:
Vocabulary for making fairy butterfly wings:
- flowers / plants / stalk / stem / petals / leaves
- soft / crispy / dry / sticky
- delicate / fragile
- transparent / opaque
- stretchy
- flutter / flap / fly
- press / rub / push down / pat
- cut / trim / snip
- glue / stick / tie
- round / curved / straight
- symmetrical
- butterfly / fairy
www.Arthurwears.com
If you have a go of this yourself, I'd love to see! Tag me on Instagram (@arthurwears) or join my private Facebook group and share your photos in there.
Would you like to subscribe to my blog posts so that you don't miss out on future posts? Just pop your email in the subscribe box at the end of this post.
Love Sarah xx
PIN ME:
More home made project ideas here:


